Insert Pictures & Google Groups
The process of sending hundreds of emails a week can be daunting and add that uncomfortable step of inserting an image into the email body to visually show what you are talking about.
What we have all found was the awaked moment of realizing I have no idea how to insert an image. Ahh, not a big deal. How hard could it be to figure this out you say to yourself while trying not to ask your coworker. Who wants to ask their coworking and look computer literate, you remind yourself.
Now the journey begins, you have no idea of how to insert this image. Five, ten, fifteen minutes go by as you franticly search for an image button that will automatically grab your photo from your desktop and perfectly insert the image into the body of your message. With no luck, you dread having to ask that wonderful co-worker. To your surprise, they also have no idea how this is done.
Oh no this means I have to ask I.T. and immediately you jump up from your chair and say, “hell no”. Now people sitting near you are wondering who you are talking to as you try to play it off by referring to the first thing that comes to mind.
We have all been through this some time in our professional lives. Today, I will walk you through three key steps to inserting images into Gmail, setting up signatures for Gmail, and explain the value of using Google Groups.
Insert Images Into Gmail
First login to your Gmail Account and click the COMPOSE button in the top left corner to start creating your email.
In the lower-right corner of the screen, a pop-up box will appear with is your “New Message”. We recommend you start filling out the sent to, email subject, and start writing the body of your message. As outlined below. When you get to the section where you want to insert the image or picture place your cursor where you want the image and click “Insert photo” which is an icon of a mountain.
An inset photo dialogue box will appear and In the middle of the browser giving you several options. The first option is to click the blue choose photos to upload box. When selected search for your photo on your desktop and select it. The second option is to drag and drop your photo from a folder or on the desktop to the Drag photos Here in light grey above the blue choose photos to upload box. Once you drag your photo here pr upload your photo it will insert your photo into the email.
In the lower-right corner of the screen where you place your cursor, the image has been successfully inserted. Feel free to click on the edge of the photo to resize it in the email message body. Once your photo has been size correctly and the message and you have completed writing your message. Click the blue sent button to send your message.
Gmail Signatures
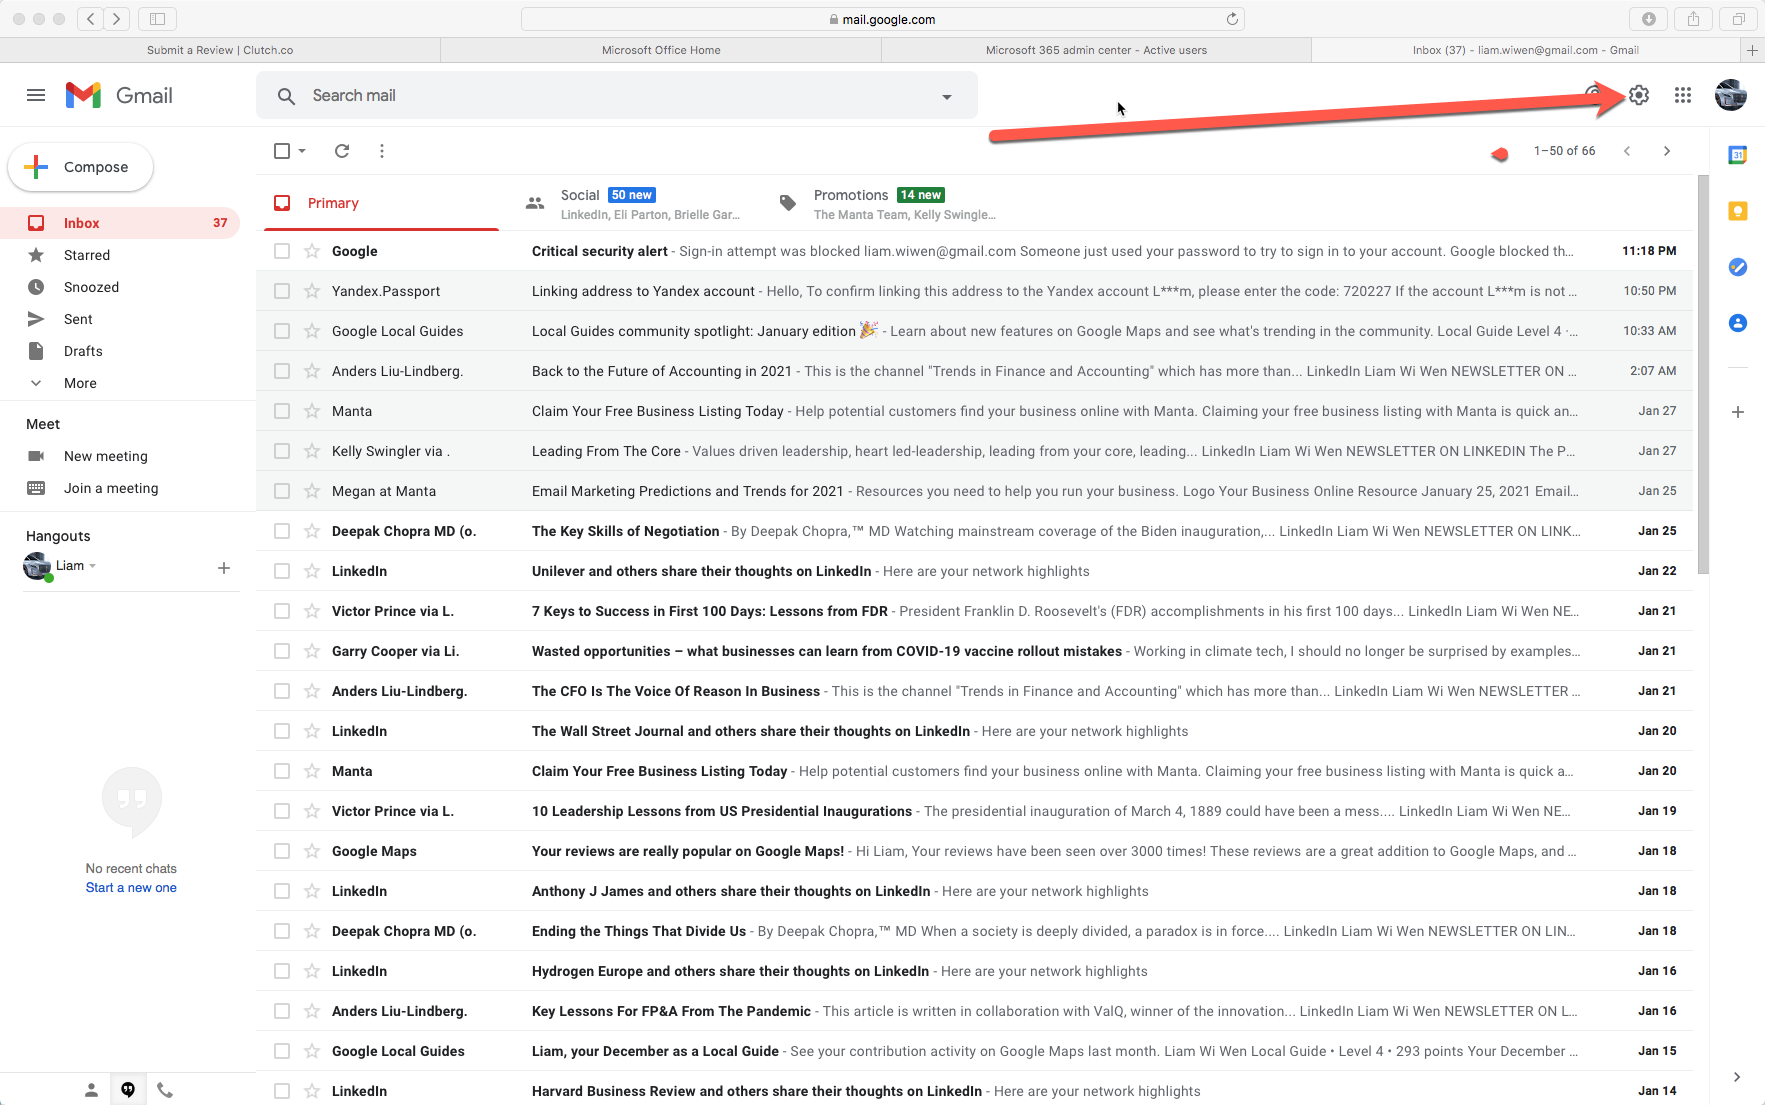
Before you get started make sure to have your signature design ready to be copied and pasted. Login to your Gmail account or if you are already logged in click the setting gear in the top right corner.
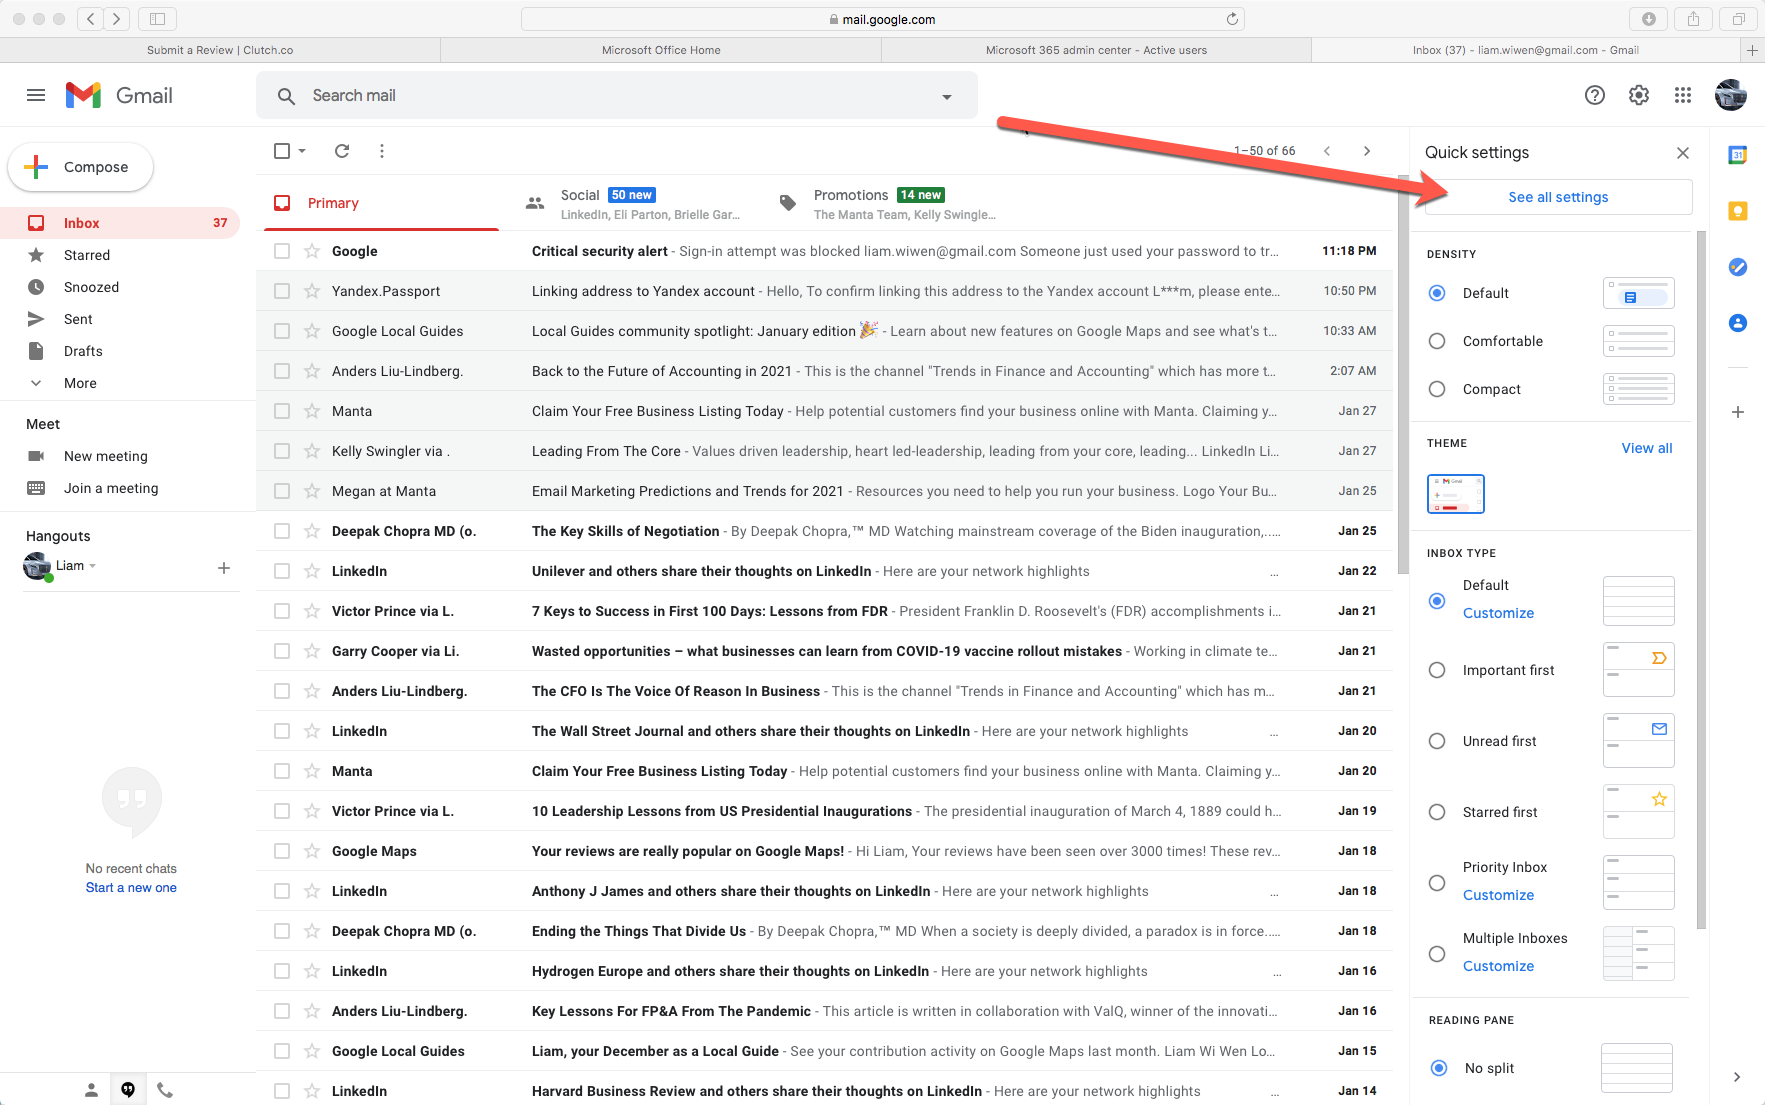
Next, click the see all settings right under the settings gear in blue text.
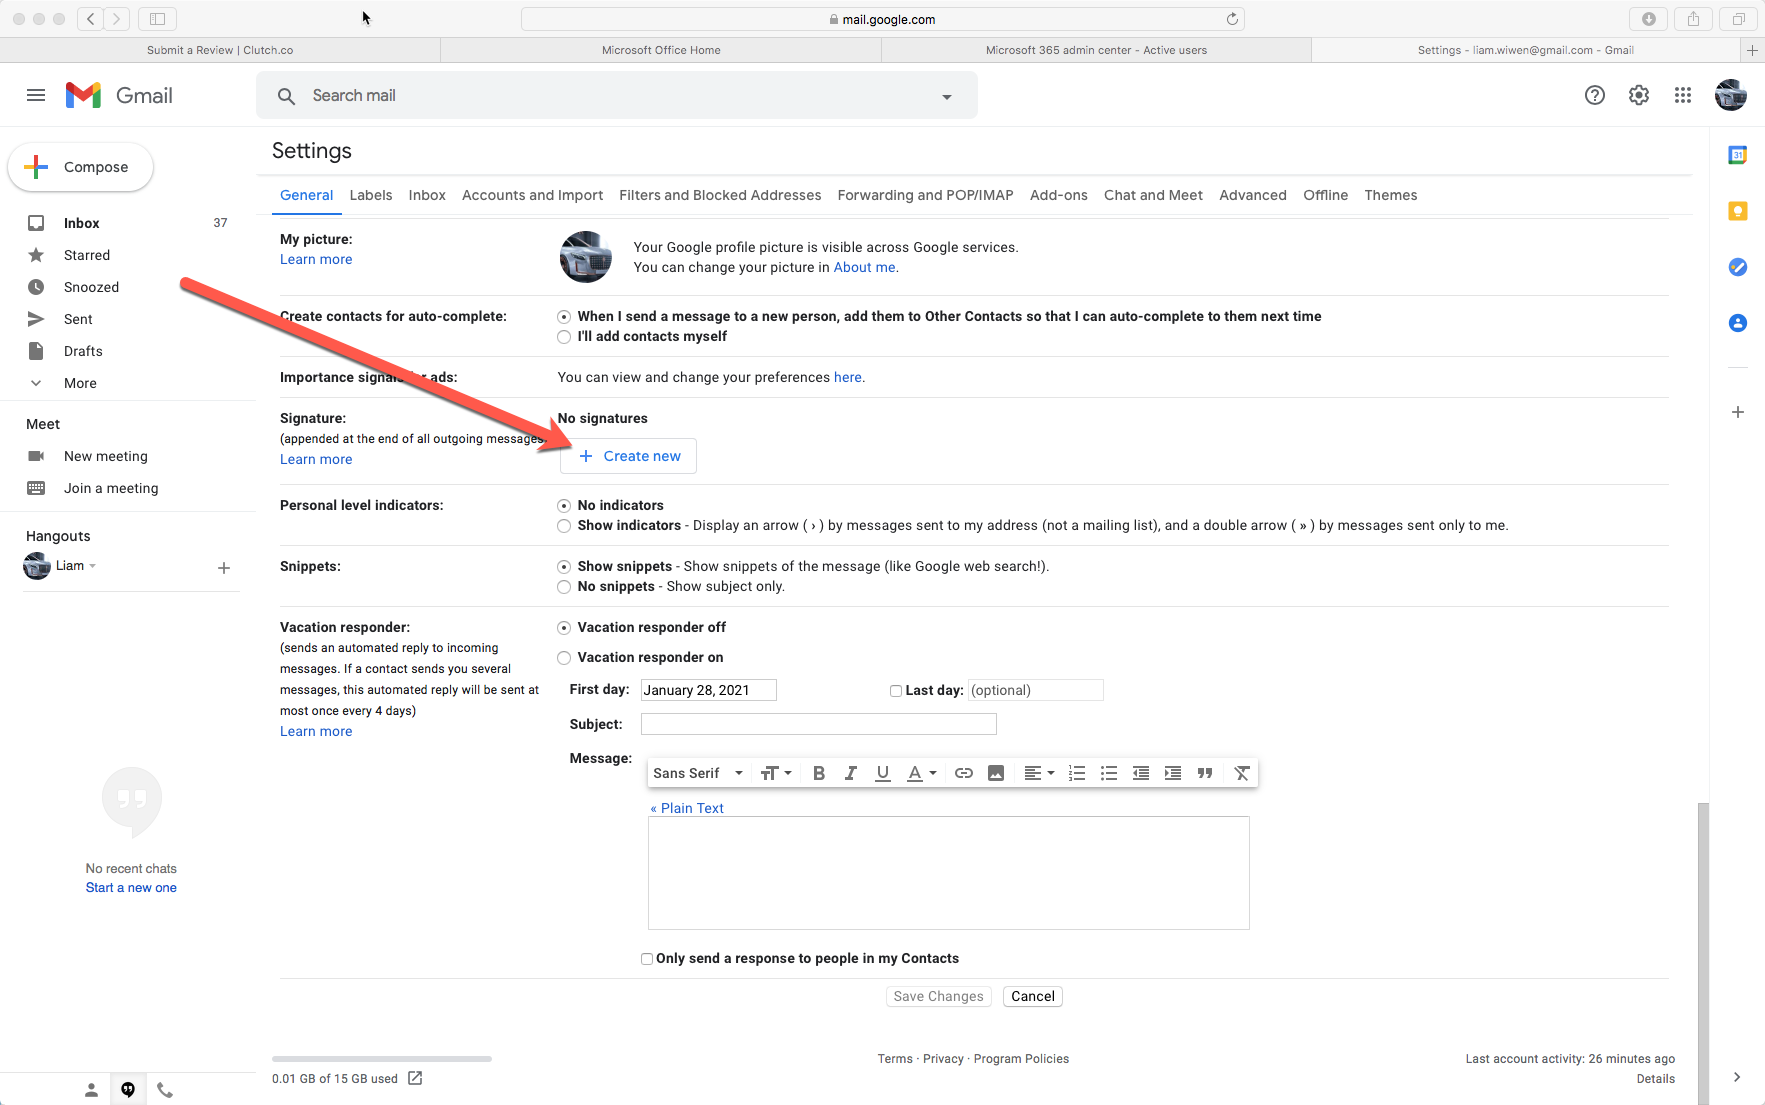
With the setting page displayed scroll down to the signature section and click the create a new button.
The Name New Signature dialogue box will appear, type in the name for your signature, and click the Create Button in blue to the right.
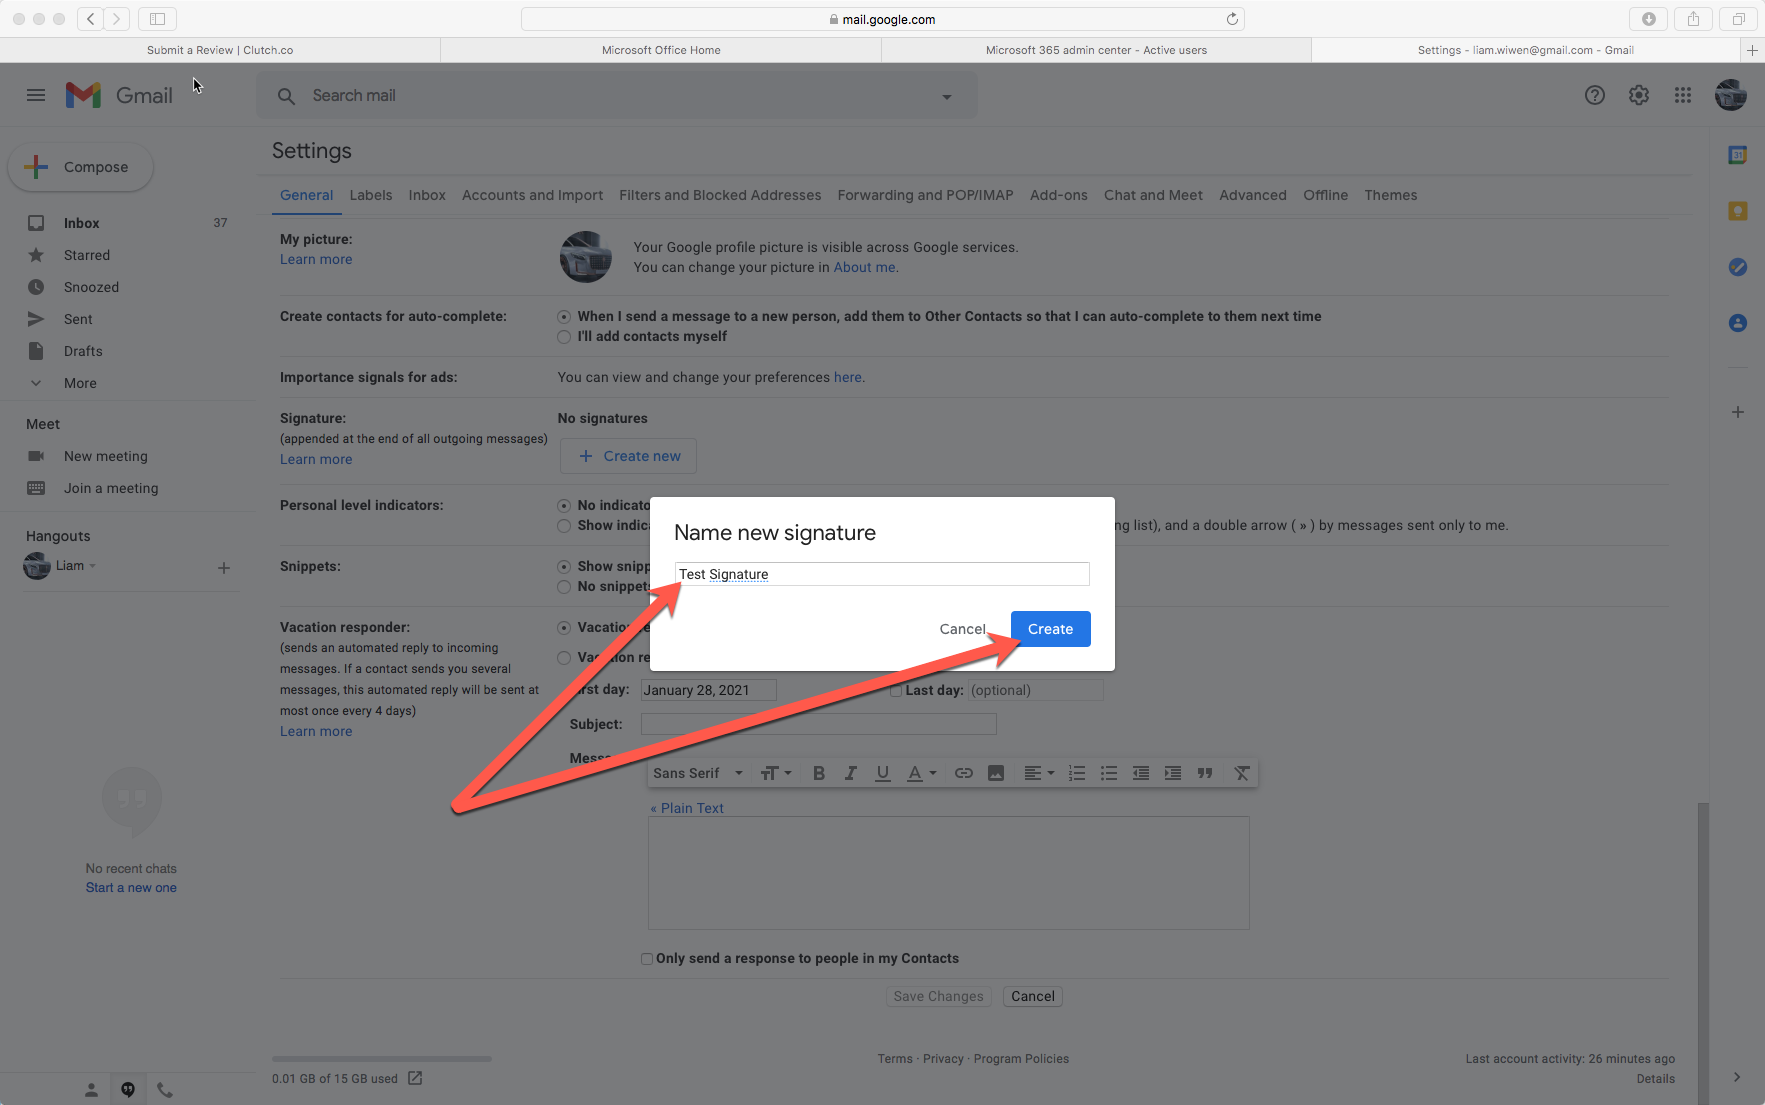
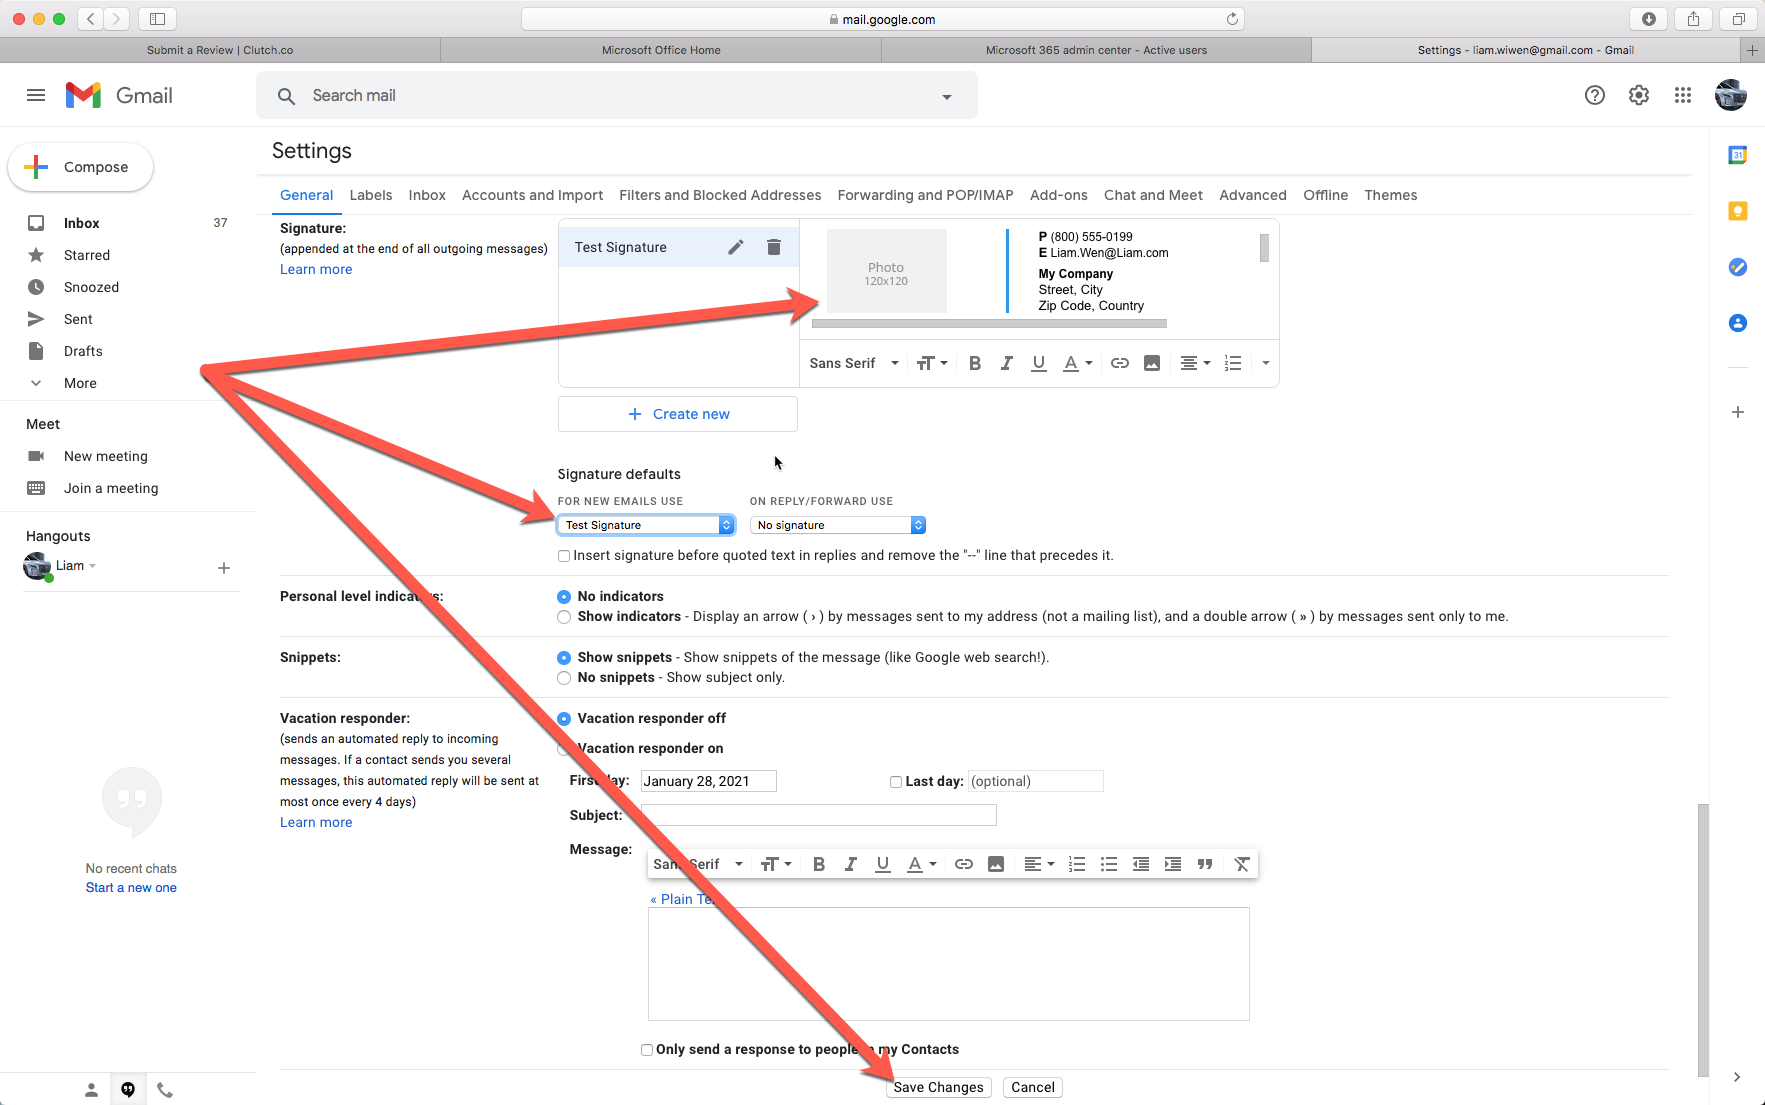
To the left of the newly named signature which I named Test Signature is a dialogue box where you will paste your email signature. Once you have completed pasting in your signature click the FOR NEW EMAIL USE dropdown and select your newly named signature which in my case is Test Signature. This will automatically insert your signature every time you create a new message. Next to the click the ON REPLY/FORWARD USE dropdown and select your newly named signature which in my case it would be Test Signature. This will automatically insert your signature every time you reply to or forward a message.
Finally, click Save Changes at the bottom of the email to save all the changes you have made. Please note you have the option to create multiple email signatures.
Value of Using Google Groups
Google Groups is one of many products offered by Google that allows users to create mailing lists, share files, creating collaborative Inboxes, create groups in multiple domains, create custom roles, add group welcome messages, allowing users to work in groups, and change the settings of your groups.
Google Groups is made up of 2 services that will help you transform how you communicate and collaborate with individuals:
- Google Groups
- Google Groups for Business
In the settings area, you can control what users can do in your organization, check out groups.google.com.
To help resolve any confusion the interface for both Google Groups and Google Groups for Business is termed Google Groups.
Google Groups allows any user to liberally manage threaded discussions, via either a web or from your email. Groups are made up of project teams, departments, and colleagues who can collaborate with you and your group via Google Groups. Similar to Basecamp or Microsoft teams If you want to invite members in the group to an event, or share sensitive documents, you can blast an email to everyone in the group. Sign in to your Google Groups to get started.
What is New with Google Groups:
- Improved Interface Navigation—Group settings are consolidated into one section for easy access.
- Simplified Group Creation—A three-step wizard simplifies group creation.
- Commanding Search Selections—New filtering and search options help you discover content.
- Streamlined My Groups Page—When you’re signed in to Google Groups (groups.google.com), all your groups are easily accessible via the same page.
- Consistent Messaging—Topics are now called conversations and fit Gmail’s overall design.
- Improved User Management—The modernized user management page offers quick access to users’ subscriptions and permissions.
Google Groups is available for Business which is Google Groups for Business. It includes additional features for Google Workspace accounts. Start your 14 days free trial of Google Groups for Business. Google Workspace core service is viewed from two perspectives: A) Is Groups for Business is on and B) Is Groups for Business is off.
A) Is Groups for Business is on you have the capability in Google Groups interface, groups.google.com to:
- Create and delete groups
- Manage group members and roles
- Manage group permissions
- View and edit group settings
B) Is Groups for Business is off you are unable to:
- Users don’t have access to your organization’s groups at the Google Groups interface, groups.google.com.
- You can’t use Collaborative Inboxes in your organization.
- If you are not an administrator you can’t create your groups in your organization.
- Only administrators can create and manage email list groups in the Admin console, the Directory API, or Google Cloud Directory Sync.
- Users in your organization will not be able to view external groups from their organization accounts.
For more information visit us : https://thetrustedautomation.com/ to meet with one of our web design consultants or call us at (949) 333-7200.
This article is written by The Trusted Automation Advisory team, provides advisory services for leaders worldwide. If you have any questions, you can contact us via email at inquire@thetrustedautomation.com, from their website at https://thetrustedautomation.com, or phone at (949) 333-7200.
Montfichet & Company’s marketing agency consulting practice, which provides consulting services for Advertising on Craigslist in Phoenix, Arizona. If you have any questions, you can contact us via email at atlanta@montfichet.com, from their website at https://montfichet.com, or phone at (949) 333-7200.
See you soon and good luck!


